


150–300 dpi Photo Yard Sign Resolution, Free Proofs, 24 Hour Prints
For photo yard signs, aim for a minimum of 150 dpi at final trim size, with 300 dpi recommended when your photo has fine detail you want to hold up close. An 18 x 24 sign at 150 dpi needs a file at least 2,700 x 3,600 pixels; at 300 dpi that doubles to 5,400 x 7,200 pixels. Set your file up in CMYK, since printers check color mode, resolution, and bleed the moment your file lands in their system.
TL;DR:
- Use at least 150 dpi for signs up to 18 x 24 inches, with 300 dpi needed for close-up images or highly detailed photos.
- Ensure your photo file has the correct pixel dimensions based on your sign size and target DPI, and build in a 0.125-inch bleed to avoid cropping issues.
- Avoid using social media images, which are often compressed and too low in resolution for large prints, and always check file resolution before uploading.
- Export your file in CMYK color mode at full quality, with no compression or downsampling, to ensure accurate colors and sharpness in print.
- Always review a proof before final printing, especially for resolution and color accuracy, to prevent blurry or pixelated yard signs.
Table of Contents
- Understanding Photo Yard Sign Resolution: DPI, PPI, and Pixel Math
- How to Prepare Your Photo File for Printing
- Pixel Dimensions and DPI Targets by Sign Size
- Why Photos Turn Out Blurry or Pixelated on Print
- Uploading, Proofing, and What Happens Next
- What I’ve Learned Reviewing Yard Sign Files
- Get Your Photo Yard Sign Printed Right the First Time
- Sources
Understanding Photo Yard Sign Resolution: DPI, PPI, and Pixel Math
DPI stands for dots per inch, and it tells the printer how much ink detail to lay down at your sign’s final size. PPI, or pixels per inch, describes your image file itself. The two terms get used almost interchangeably in sign printing, and for your purposes, they mean the same thing: how many pixels are packed into each inch of your printed sign.
The math is simple once you see it laid out. Multiply your sign’s width in inches by your target DPI, then do the same for height, and you get your required pixel dimensions.
- A 12 x 18 sign at 150 dpi needs 1,800 x 2,700 pixels.
- The same 12 x 18 sign at 300 dpi needs 3,600 x 5,400 pixels.
- An 18 x 24 sign at 150 dpi needs 2,700 x 3,600 pixels, and at 300 dpi that becomes 5,400 x 7,200 pixels.
Here’s where viewing distance changes the equation. A yard sign posted at the curb gets read from a moving car or a sidewalk 10 to 20 feet away, not from six inches under a magnifying glass. That’s why 150 to 300 dpi is the accepted range for most yard signs rather than the 300 dpi minimum you’d want for a brochure held in someone’s hand. If your photo has a close-up subject, like a real estate agent’s headshot or a graduate’s face, push toward 300 dpi because clarity differences show up noticeably at that range.
Upsampling, or artificially stretching a low-res photo to hit your target pixel count, is a limited fix at best. Software can interpolate new pixels, but it can’t invent detail that was never captured.
How to Prepare Your Photo File for Printing
Getting your file print-ready comes down to five steps, and skipping any one of them is the most common reason orders get delayed.
- Choose the right file type. Vector formats like PDF, EPS, or SVG scale to any size without losing quality, which makes them the preferred choice when your design allows it. For photo-based designs, you’ll be working with raster formats instead: high-quality JPEG, PNG, or TIFF files sized correctly for final output.
- Set your document to final trim size plus bleed. If your sign prints at 18 x 24 inches, build your canvas at 18.25 x 24.25 inches to account for a 0.125-inch bleed on all sides.
- Keep critical content inside the safe margin. Text, logos, and faces should sit at least 0.25 inches inside the trim line so nothing important gets clipped during cutting.
- Export at full quality. Choose CMYK color mode when your software allows it, and export as a maximum-quality JPEG or a high-resolution PDF with no downsampling applied.
- Verify resolution before uploading. In Photoshop, check Image Size and confirm both the pixel dimensions and the resolution field read 150 dpi or higher at your final print size. On a Mac, Preview’s Tools menu shows the same data under “Adjust Size.” Free online tools like Craftsuprint’s print guide walk through similar checks if you’re working without design software.
Pro Tip: If your design software only offers RGB, don’t panic, just know the printer will convert it to CMYK on their end, and colors like deep reds and bright blues may shift slightly. Building in CMYK from the start avoids that surprise entirely.
Pixel Dimensions and DPI Targets by Sign Size
Your pixel requirements scale directly with sign size and target DPI. Here’s what you need for two of the most common yard sign dimensions, including the extra pixels bleed adds to your canvas.
| Sign Size | Final Trim (150 dpi) | Final Trim (300 dpi) | With 0.125" Bleed (150 dpi) |
|---|---|---|---|
| 12 x 18 in | 1,800 x 2,700 px | 3,600 x 5,400 px | 1,800 x 2,700 px |
| 18 x 24 in | 2,700 x 3,600 px | 5,400 x 7,200 px | 2,700 x 3,600 px |
Keep important text or faces roughly 38 pixels inside the trim edge at 150 dpi (double that at 300 dpi) to respect the 0.25-inch safe margin. If your sign will hang far from foot traffic, along a highway frontage road or a large event field, you can often lean toward the lower end of that dpi range since distance does a lot of the softening work for you.
Why Photos Turn Out Blurry or Pixelated on Print
Most resolution problems trace back to a handful of repeat offenders, and every one of them is avoidable if you catch it before you upload.
- Pulling a photo straight from Instagram or Facebook, which compresses images down to a fraction of their original file size.
- Ignoring bleed and safe margins, which causes cropping surprises even when resolution is perfect.
- Saving a JPEG at low quality settings multiple times, which stacks compression artifacts with each save.
- Skipping a color proof, which leads to washed-out or shifted tones you didn’t expect.
Vendors specifically warn against using social media images because platforms strip resolution automatically. A photo that looked crisp on your phone screen might only be 800 x 800 pixels by the time it’s downloaded from a social feed, which is nowhere near enough for an 18 x 24 sign at any usable DPI.
To check a photo before you commit, zoom to 100% in your editing software and look at faces or text edges directly. If you see soft blur or visible squares (pixelation), the file won’t sharpen up in print. Your fix options at that point are recapturing the photo at higher resolution, cropping into a smaller area that has more detail per pixel, or asking your printer to run a mockup so you can see the real result before the final print run.
Uploading, Proofing, and What Happens Next
Once you upload your file, most printers run it through both automated and human checks. Automated systems flag resolution below the target DPI, missing bleed, and non-print color modes like RGB. Human proofers then look at the whole design for readability, cropping issues, and overall balance before your order moves to production.
- You’ll typically receive a digital mockup or printed proof showing exactly how your sign will look, colors and all.
- If something’s off, you request changes before printing starts, not after.
- Flagged files get an email or account notification explaining the specific issue, whether it’s resolution, bleed, or format.
Yardsigns builds free design proofs into every order, so you see your photo yard sign before it prints, not after. Orders under 50 pieces typically ship within 24 hours, which matters if you’re reacting to a last-minute listing, a campaign deadline, or an event that snuck up faster than planned.
Pro Tip: If your file gets flagged for low resolution, don’t just resize and resubmit. Go back to the original photo source, a camera roll or a professional shoot, rather than re-exporting the same compressed file at a bigger canvas size.
What I’ve Learned Reviewing Yard Sign Files
Most resolution problems aren’t really resolution problems. They’re sourcing problems. Someone grabs a photo off a website or a social post because it’s convenient, and by the time it’s printed at 18 x 24 inches, every flaw that was invisible on a phone screen is now visible from the sidewalk. The fix isn’t more technical knowledge, it’s starting with a better source file.
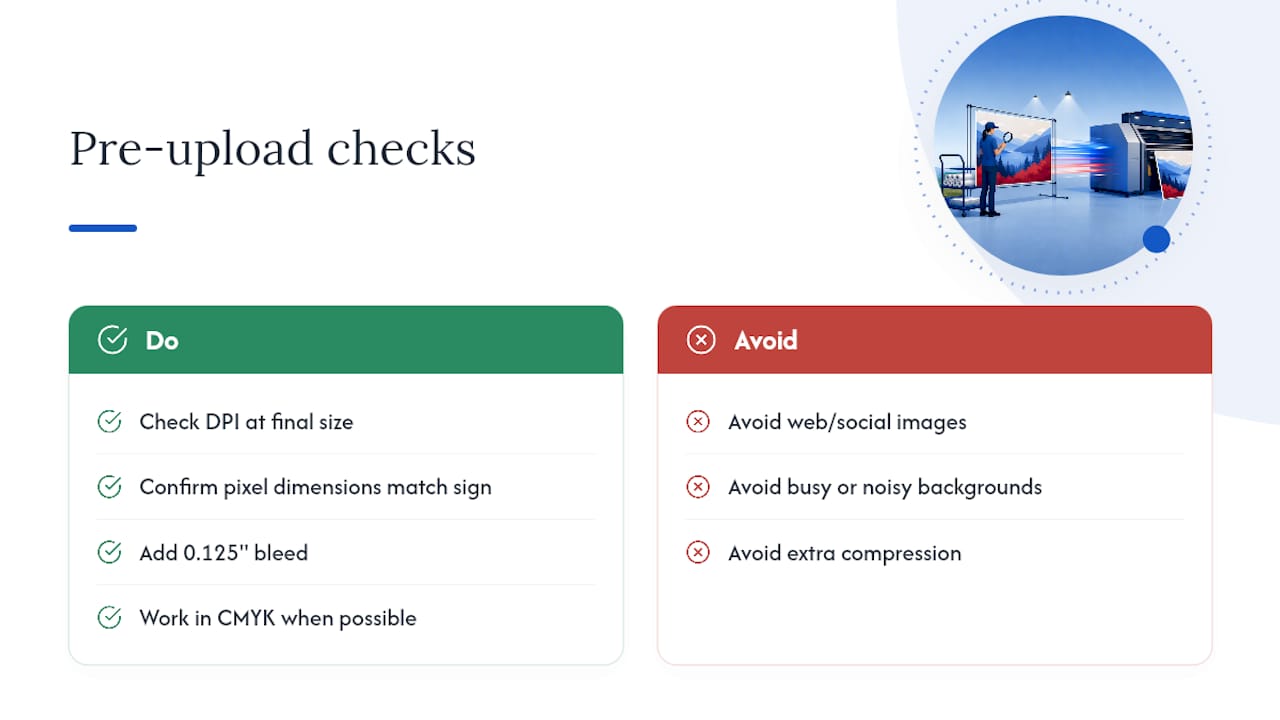
Run through this before you upload: check your DPI at final size, confirm pixel dimensions match your sign size, build in 0.125-inch bleed, work in CMYK when possible, export at full quality with no extra compression, and always request a proof. YardSigns.com backs that process with weatherproof corrugated plastic and aluminum options and UV-resistant inks that keep colors accurate in direct sun.
One last thing worth knowing: if your sign will sit in a windy spot or against a busy background like tall grass or a fence line, choose a photo with strong contrast and a simple background. Detail gets lost in visual noise faster than it gets lost in low resolution.
— YardSignGuy
Get Your Photo Yard Sign Printed Right the First Time
Getting resolution right on your own is only half the job. The other half is knowing your file will actually print the way it looked on your screen, and that’s where Yardsigns earns its keep. Every order includes a free design proof, so you catch resolution or color issues before ink ever hits material, not after a sign shows up blurry on your lawn.
Orders under 50 signs ship within 24 hours, which means a last-minute listing photo or a campaign deadline doesn’t have to turn into a scramble. Signs print on weatherproof corrugated plastic or aluminum with UV-resistant inks, so the photo that looked sharp in your proof still looks sharp after a month of sun and rain. Ready to see your photo at full size? Start your custom yard sign order and upload your file for a free proof today.
Sources
For deeper detail on export settings, VistaPrint and Custom Ink both publish general sign printing guidance and a complete buyer’s guide covering pixel math and file formats. M13 Graphics breaks down bleed and color mode requirements in more technical detail. For sizing decisions specific to your layout, YardSigns.com’s guide on choosing the right sign size is worth a read before you finalize your file.
- Custom Yard Signs and Lawn Signs: The Complete Buyer’s Guide - Custom Ink Blog
- Yard Sign Printing | M13 Graphics
