


High Wind Yard Signs: Durable, Windproof Options
For high-wind sites, the most reliable setup combines a weatherproof corrugated plastic panel (4mm or thicker coroplast with heavy flutes) or an aluminum panel for permanent installs, a properly ballasted or bolt-in frame, and a wind-relief design feature such as slits or mesh cutouts. That combination keeps your sign visible and standing when lighter setups fail.
Must-have components at a glance:
- Panel: 4mm+ corrugated plastic or .040" aluminum for exposed locations
- Hardware: Metal H-stakes driven 12–18 inches deep, or a bolt-in angle-iron frame for permanent sites
- Ballast: Sand- or water-filled base weighted to match your expected gust speed (roughly 70 lbs for 40 mph resistance, up to 130 lbs at maximum rated stability)
- Wind relief: Slits, perforations, or mesh panels for signs larger than 24" x 36"
- Safety check: Confirm local ordinances, HOA rules, and setback distances before you drive a single stake
Quick safety note: Remove or lay flat any sign when a storm warning is issued. A sign that becomes a projectile is a liability, not a marketing asset.
Key Takeaways
Wind-resistant yard signs require the right material, properly matched ballast, and secondary anchoring to stay standing in gusts above 30 mph.
| Point | Details |
|---|---|
| Match ballast to wind speed | Fill portable bases to roughly 70 lbs for 40 mph resistance, up to 130 lbs for stronger conditions. |
| Choose 4mm+ coroplast or aluminum | Thicker panels resist flute collapse; aluminum suits permanent installs where stiffness is critical. |
| Drive stakes 12–18 inches deep | Shallow stakes are the most common cause of sign failure in high-wind corridors. |
| Inspect every 30 days | Check stake depth, grommet integrity, and secondary ties after any storm or sustained wind event. |
| Yardsigns ships within 24 hours | Orders under 50 pieces ship within 24 hours with H-stakes included and free proofs before production. |
Table of Contents
- What should you buy for a high-wind yard sign setup?
- Which materials actually hold up in gusts?
- How do anchors and hardware compare for windy sites?
- Design choices that reduce wind load and extend sign life
- Step-by-step installation for high-wind sites
- How often should you inspect and maintain wind-resistant signs?
- What do high-wind yard signs cost, and how fast can you get them?
- Where to check local rules before you install
- How Yardsigns manufactures durable weatherproof yard signs
- What most people get wrong about wind-resistant yard signs
- Yardsigns weatherproof signs: ready to order for high-wind sites
- Sources
What should you buy for a high-wind yard sign setup?
Think of this as your one-trip shopping list. Get these items right before you order, and you will avoid the most common field failures.
Panels
- 4mm corrugated plastic (coroplast) for temporary campaigns up to 90 days
- 6mm coroplast for sites with consistent wind or longer runs
- .040" aluminum for permanent or semi-permanent installs where stiffness matters
Frames and stakes
- Standard wire H-stakes (9-gauge) for calm to moderate wind sites
- Heavy-duty H-stakes (double-stake setup) for larger panels or gusty corridors
- Bolt-in angle-iron frame for roadside or long-term locations
Bases for portable signs
- Spring-mounted sidewalk base with a fillable ABS reservoir (fill with sand for best stability)
- Water-fillable A-frame base for temporary events
Anchoring extras
- Zip-ties or bungee cords as secondary ties between panel and stake
- Grommet reinforcement tape for panels with pre-punched holes
- Rubber mallet for driving stakes without bending the wire
Pro Tip: For any exposed corner lot or roadside location, buy two H-stakes per panel and drive them at a slight outward angle. The spread creates a wider footprint and resists rotation far better than a single centered stake.
Which materials actually hold up in gusts?
The substrate you choose determines how much wind load your sign can absorb before it tears, warps, or flies.
Corrugated plastic (coroplast)
Coroplast is the industry standard for temporary yard signs. Its hollow flute channels run parallel to the long edge of the panel, which is why you insert H-stakes along the flute direction. Standard 4mm panels work well in moderate conditions. For windy sites, 6mm panels add stiffness and resist flute collapse under lateral pressure. One critical spec to know: assembly instructions for snap-frame sidewalk signs specify that the sign face should not exceed a recommended weight per side to avoid overstressing the frame, so keep panel size and substrate weight in check when ordering for spring-mounted bases.
Aluminum panels
Aluminum does not flex or absorb moisture, which makes it the right call for permanent roadside signs, real estate frames, and contractor sites where the sign stays up for months. An aluminum panel paired with a bolt-in angle-iron frame transfers wind loads directly into the ground rather than relying on surface ballast. The trade-off is cost: aluminum panels run higher per unit than coroplast, but the lifespan difference often justifies it for long campaigns.
Mesh and perforated panels
Mesh banners let air pass through the panel surface, which cuts the sail effect that causes solid panels to tip or tear. The trade-off is image fidelity: fine detail and gradients lose some sharpness on mesh. For very windy locations where a solid panel keeps failing, mesh is the practical answer. Keep your message bold, high-contrast, and limited to 3–4 words so legibility holds up.
Pro Tip: Moving from 4mm to 6mm coroplast adds only a small cost per panel but meaningfully increases resistance to flute collapse. If your site regularly sees gusts above 30 mph, the upgrade pays for itself in fewer replacements.
How do anchors and hardware compare for windy sites?
The right anchor depends on how long the sign stays up, how exposed the site is, and whether you need to move it.
H-stakes (wire frames)
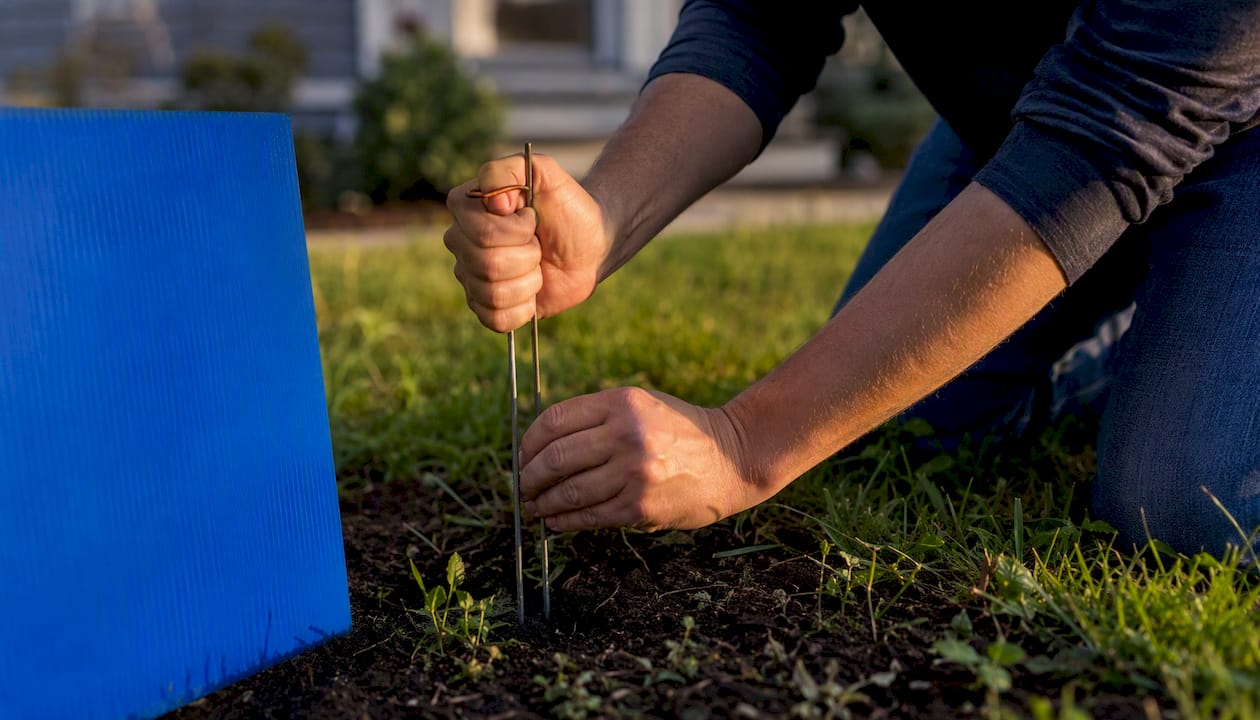
Wire H-stakes are the default for temporary corrugated plastic signs. They work well in firm soil at moderate wind speeds. Drive them using even foot pressure on the crossbar, not by hammering the top, which bends the wire. For larger panels or gusty corridors, professional installation guides recommend upgrading to heavy-duty frames rather than relying on standard wire stakes.
Bolt-in angle-iron frames
Heavy-duty bolt-in frames are built from 1" x 1" angle-iron steel with a stability bar approximately 12 inches from the bottom. They accept industry-standard 18" x 24" panels and are designed for long-term outdoor use in wind and snow. Installation requires a hammer or post driver to seat the legs, but once in, they do not shift. For permanent installations, bolt-in frames remain the most reliable option because they transfer loads deeper into the ground and do not depend on surface ballast.
Spring-mounted and weighted sidewalk bases
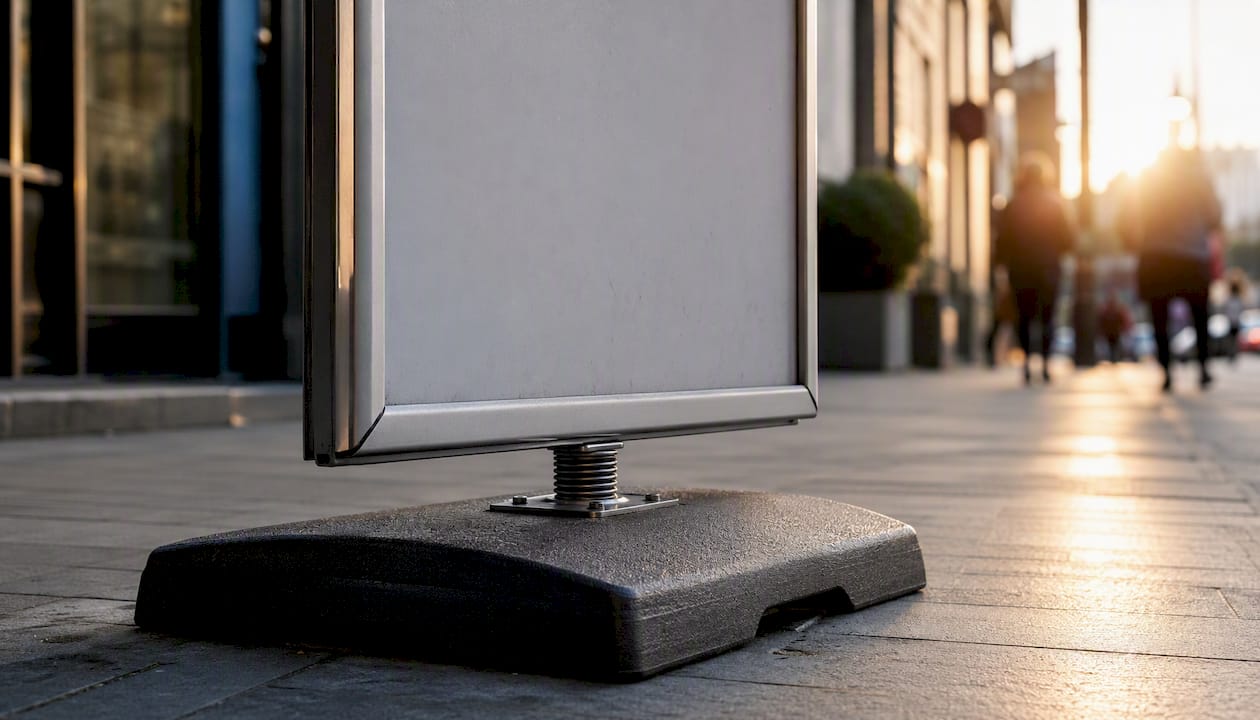
When portability matters, spring-mounted bases are the smart compromise. Weighted ABS bases with spring-mounted aluminum snap frames absorb gust energy and reduce tip risk compared with rigid frames. Fill the base with sand rather than water for heavier, more stable ballast. These units typically weigh around 27 lbs empty and accept double-sided PVC graphics for maximum visibility.
Grommets, zip-ties, and secondary anchors
Add grommets at the top two corners of any panel you plan to tie down. Use UV-resistant zip-ties or nylon rope through the grommets and loop them around the stake or frame. Check the ties every 30 days; UV exposure degrades plastic zip-ties faster than most people expect.
Design choices that reduce wind load and extend sign life
Size and orientation are not just aesthetic decisions. They directly affect how much force a gust exerts on your sign.
- Downsize when in doubt. An 18" x 24" panel presents roughly half the surface area of a 24" x 36" panel. In a 40 mph gust, that difference in drag is significant. If your message fits on a smaller sign, use it.
- Choose landscape over portrait for wide, open sites. A landscape-oriented sign sits lower to the ground, lowers the center of gravity, and reduces the lever arm that tips the stake.
- Add wind slits to large panels. Professional printers advise cutting wind slits into corrugated plastic panels larger than 24" x 36" to reduce the sail effect and prevent flange tears. Slits run vertically, spaced evenly across the panel width.
- Use mesh for coastal or very exposed sites. Perforations reduce wind load while keeping the sign structure intact. Bold, simple graphics hold up best on mesh.
- Keep critical text away from edges. Wind stress concentrates at corners and edges. Leaving a 1.5" margin keeps your message intact even if the panel edges fray.
Fine detail disappears on perforated substrates, but a bold headline at 4 inches tall reads clearly from 50 feet.*
Step-by-step installation for high-wind sites
Follow this sequence every time, and you will avoid the most common causes of sign failure.
- Assess the site. Check soil type (clay holds stakes better than sandy loam), identify the prevailing gust direction, measure setback from the curb, and note any overhead utilities before you dig or drive.
- Mark your placement. Use a stake or flag to mark the exact spot. Confirm you are within the permitted setback distance from the road and property line.
- Mount the panel. Slide the coroplast panel onto the H-stake along the flute channels. For bolt-in frames, align the panel and tighten the bolt hardware.
- Add ballast if using a portable base. Fill the ABS reservoir with sand. Match the fill weight to your expected wind speed: approximately 70 lbs for 40 mph head-on resistance, up to 130 lbs at maximum rated stability. Level the sand and shake the base gently to settle it.
- Attach secondary ties. Thread zip-ties through grommets and loop around the frame or stake. Snug but not so tight that they stress the grommet hole.
- Test for tip and rotation. Push the top of the sign firmly in the direction of the prevailing wind. If it tips more than a few degrees or rotates on the stake, add a second stake or increase ballast.
- Safety check near traffic. Stand back and confirm the sign does not obstruct sightlines for drivers at the nearest intersection. If it does, reposition before you leave the site.
Safety note: Call 811 (the national Dig Safe line) before driving any anchor deeper than 12 inches. Underground utilities are more common in residential yards than most people expect.
How often should you inspect and maintain wind-resistant signs?
A 30-day inspection cycle is the professional standard for outdoor yard signs. More frequent checks make sense after any storm or sustained wind event.
What to check at each inspection:
- Stake depth: re-drive any stake that has worked loose or shifted
- Panel condition: look for torn flutes, cracked corners, or fading UV ink
- Grommet integrity: replace any grommet showing cracks or elongation
- Secondary ties: replace UV-degraded zip-ties before they snap
- Ballast level: top off sand or water in fillable bases that have settled or evaporated
Quick field repairs:
- Loose stake: remove, reposition 2 inches to fresh soil, re-drive to full depth
- Torn flute edge: apply grommet reinforcement tape and add a secondary zip-tie
- Faded panel: replace the panel face; reuse the hardware
Storage best practices:
When signs are not in use, store coroplast panels flat or vertically in a dry, shaded space. Stacking panels horizontally under weight causes warping. Keep aluminum panels away from salt spray during off-season storage to prevent edge oxidation. UV exposure degrades both ink and substrate, so even short-term outdoor storage between campaigns shortens panel life. For guidance on how weather affects overall sign lifespan, Yardsigns covers the key environmental factors in detail.
What do high-wind yard signs cost, and how fast can you get them?
Budget planning for wind-resistant signage involves both the panel and the hardware. Here is a realistic breakdown.
Typical price ranges:
- Single 4mm corrugated plastic panel (18" x 24", custom printed): $8–$20 depending on quantity
- Single 6mm coroplast panel: slightly higher per unit
- Aluminum panel (.040", 18" x 24"): $25–$60 per panel depending on quantity and finish
- Standard wire H-stakes: $1–$3 each
- Heavy-duty bolt-in angle-iron frame: $15–$30 per frame
- Spring-mounted weighted sidewalk base with custom graphics: retail listings show prices around $295 for a complete unit with double-sided PVC graphics
- Grommets and zip-tie hardware: under $10 for a full install kit
Turnaround times:
- Small orders (under 50 pieces): many custom printers ship within 24 hours
- Larger runs (50+ pieces): typically 1–3 business days in production
- Expedited options: available from most online sign printers for an additional fee
What adds time or cost:
- Custom artwork from scratch (vs. using a template): adds a proof round, usually 1 business day
- Double-sided printing: standard at most quality printers, confirm it is included before ordering
- Grommets and wind slits: often available as add-ons; confirm at checkout
- Bulk discounts typically kick in at 10+ pieces and become significant at 50+ pieces
Where to check local rules before you install
Installing a sign without checking local rules can result in fines or forced removal. Check these sources before you drive a stake.
- City or county code: Search “[your city] sign ordinance” on your municipality’s official website. Most codes specify maximum sign dimensions, permitted zones, and how long a sign can remain posted.
- State DOT guidelines: For any sign near a state or federal road, check your state Department of Transportation’s roadside advertising rules. Setback distances from the right-of-way vary by road classification.
- HOA covenants: If the property is in a homeowners association, review the CC&Rs for sign size limits, permitted locations, and duration restrictions. HOA rules often exceed local code in their restrictions.
- Utility locate: Call 811 before driving any anchor deeper than 12 inches. This is free, required by law in most states, and takes 2–3 business days to complete.
- Local code enforcement: When in doubt, a 5-minute call to your city’s code enforcement office clarifies the rules faster than any online search.
Common restrictions to expect: setback distances of 5–10 feet from the curb, maximum sign area of 6 sq ft in residential zones, and permitted durations of 30–90 days for temporary signs.
How Yardsigns manufactures durable weatherproof yard signs
Yardsigns produces custom corrugated plastic and aluminum yard signs built to handle real outdoor conditions. The specs matter: panels use UV-resistant inks that resist fading through extended sun exposure, and double-sided printing is standard so your message reads clearly from both directions without an extra order step.
What you get with a Yardsigns order:
- Corrugated plastic panels in standard thicknesses suited for outdoor use
- UV-resistant, full-color printing on both sides
- Metal H-stakes included with most orders
- Free design proofs with unlimited revisions before production
- Templates for real estate, contractor, political, event, and business campaigns
Orders under 50 pieces ship within 24 hours of proof approval, which matters when a campaign window is short or weather conditions change your timeline. Larger runs of 50+ pieces typically move through production in 1–3 days. For a deeper look at how substrate choices affect wind and weather performance, the Yardsigns guide to weather-resistant sign materials walks through the specs in detail.
Pro Tip: When ordering for a high-wind site, select double-sided printing and confirm grommet placement at checkout. Both features add minimal cost but significantly extend the useful life of the sign in exposed locations.
What most people get wrong about wind-resistant yard signs
The conventional wisdom says “use a heavier sign.” That is only half right. The real variable is the match between ballast weight and expected wind speed, not just the presence of ballast. A base filled to 40 lbs in a corridor that regularly sees 55 mph gusts will tip just as reliably as an empty one. The ballast chart from manufacturer installation guidance makes this concrete: 70 lbs handles roughly 40 mph head-on, but you need up to 130 lbs at maximum rated stability for stronger conditions.
The second mistake is treating the primary anchor as the only anchor. Secondary ties through grommets are not optional extras for high-wind sites. They are the difference between a sign that survives a gust and one you find in a neighbor’s yard the next morning.
Finally, people underestimate how much panel size affects failure rate. Downsizing from a 24" x 36" to an 18" x 24" panel is not a compromise. In a windy corridor, it is the smarter specification.
Yardsigns weatherproof signs: ready to order for high-wind sites
Yardsigns delivers exactly what this article recommends: weatherproof corrugated plastic panels printed with UV-resistant inks, double-sided by default, and shipped with metal H-stakes included. You do not need to source hardware separately or wait a week for production. Orders under 50 pieces ship within 24 hours of proof approval, which means you can place an order today and have signs in the ground before the weekend.
For contractors, real estate agents, and event organizers who need signs that stay visible through wind and weather, the Yardsigns custom sign catalog covers the full range of sizes, substrates, and templates. If you want a ready-made template built for durability, the handyman and contractor sign templates are a practical starting point. Free proofs, unlimited revisions, and bulk pricing make it straightforward to get exactly the sign your site needs.
Sources
- WindSignsInstruction 8228 10-2016
- Wind Resistant Sidewalk Sign with Custom Graphics | Displayit
- Heavy Duty Bolt-In Frame for 18"H x 24"W Sign
