


Real Estate Sign Dimensions: The Agent's Size Guide
The standard residential real estate sign typically fits within panel sizes commonly used across the United States, which accommodate most standard H-stakes and retail frames. Larger sizes are used for high-visibility needs like busy roads or large lots, and smaller sizes for directional or open-house signs. Yardsigns.com confirms these common panel size categories as popular choices among agents.
Quick verdict before you read further:
- Standard residential yard signs generally fit common H-stakes and retail frames
- Larger panels suit high-visibility needs such as busy roads, long setbacks, or large lots
- Smaller panels are suitable for directional signs, open-house arrows, and temporary routing
- Always verify local rules first. Newport Beach, for example, caps real estate signs at 1.5 square feet and 4 feet maximum height — smaller than the industry standard 18"×24" panel.
- Aim for a minimum main-line letter height that meets stricter state legibility expectations to ensure readability.
Once you know your local limits, match panel size to road speed and content volume, then order hardware that fits.
Table of Contents
- What are the standard real estate sign dimensions by sign type?
- How do you choose the right sign size for your listing?
- Which material should you choose for your panel size?
- What mounting hardware works with each panel size?
- What file specs do you need for print-ready real estate signs?
- What local and state rules should you check before printing?
- What sizing and design mistakes do agents most often make?
- Key Takeaways
- The size that actually moves listings
- Yardsigns has your real estate signs ready to ship fast
What are the standard real estate sign dimensions by sign type?
The table below maps the four common panel sizes to their typical use, visibility range, material, and hardware compatibility. Use it as a quick reference when filling out an order form or briefing a designer.
| Panel Size | Best For | Common Material | Mounting / Hardware | Sided |
|---|---|---|---|---|
| Panel Size | Typical Dimensions | Best For | Common Material | Mounting / Hardware |
| — | — | — | — | — |
| Standard residential listing panel | 18"×24" | Used widely for typical listings | Corrugated plastic (coroplast) | Metal H-stake, retail wire frame |
| Medium-sized panel | 24"×30" | Suitable for mid-size lots and roads | Corrugated plastic or aluminum | 2-post wood/metal frame |
| Larger panel | 24"×36" | For high-speed roads, large setbacks, commercial use | Aluminum, rigid PVC | 2-post frame, post mount |
| Small directional panel | 12"×18" | Used for arrows, open-house signs | Corrugated plastic | H-stake, A-frame insert |
| Rider panel | 24"×6" | Supplemental info like price or agent name | Corrugated plastic or aluminum | Rider clips on post-mounted sign |
Visibility note: Readable distance estimates above assume clear contrast, a minimum 2-inch main-line letter height, and a driver approaching at typical residential speeds. Faster roads or longer setbacks push you toward the next size up.
Double-sided printing is standard practice for post-mounted and H-stake signs because drivers approach from both directions. Single-sided panels work for A-frame inserts and wall-mounted applications where only one face is visible.
How do you choose the right sign size for your listing?
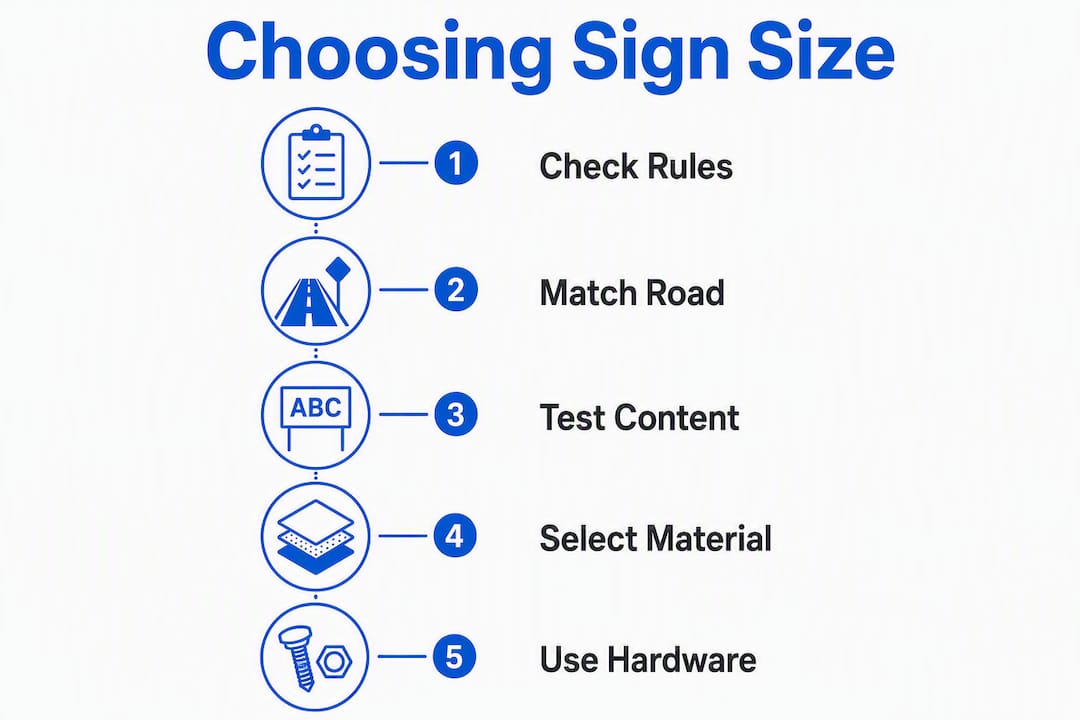
Three checks, in order. Run through them before you place any order.
1. Verify local, HOA, and MLS restrictions
Municipal codes and HOA covenants can cap panel area, limit height, require agent contact information, and even set minimum letter heights. These rules override industry standards. Check your city or county planning department’s website, your HOA’s CC&Rs, and your MLS board’s sign rules before you commit to a size. Bulk-ordering 50 signs in a size your municipality prohibits means a reprint at full cost.
2. Match panel size to road speed and setback distance
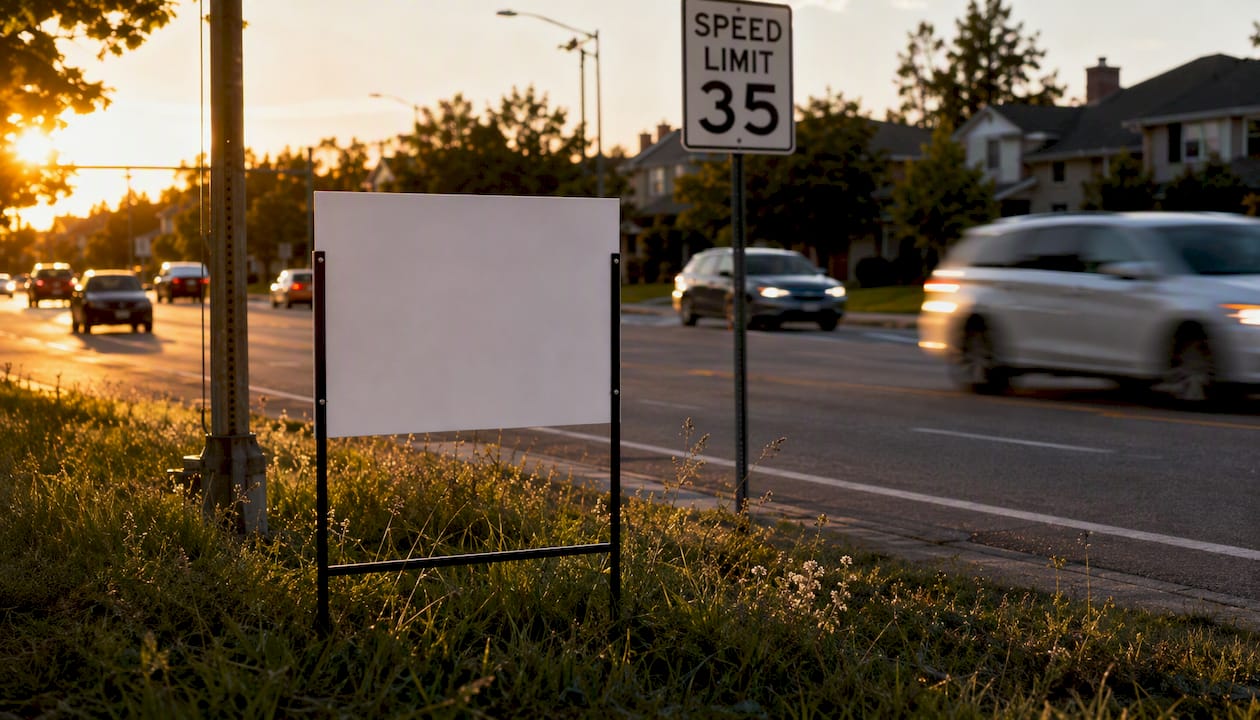
A sign set back 30 feet from a 25 mph residential street reads fine at 18"×24". The same sign on a 45 mph arterial road with a 60-foot setback will be unreadable by the time a driver can safely react. Larger panels are the right call for faster roads and longer setbacks — step up to 24"×30" or 24"×36" when either condition applies.
3. Test your message length against the panel
Count your content elements: brokerage name, agent name, phone number, website, and any tagline. Three to four elements fit cleanly on an 18"×24" panel at legible type sizes. Five or more elements either require a larger panel or demand that you cut copy. More content does not mean a bigger sign is automatically better — it means you need to edit first, then size.
Pro Tip: Before ordering, take your design file, print it at scale on paper, tape it to a stake or post, and photograph it from the curb at the actual approach distance. Walk back to where a driver would first see it. If you cannot read the main line clearly, either increase the type size or move up to the next panel size. This one step prevents most legibility reprints.
Which material should you choose for your panel size?
Material choice and panel size are directly linked. A larger panel catches more wind, flexes more under load, and costs more to replace if it fails mid-listing.
Corrugated plastic (coroplast)
The default material for 18"×24" yard signs. It is lightweight, weather-resistant, and inexpensive enough to order in bulk. The fluted core runs in one direction, so a 18"×24" panel oriented with flutes vertical is noticeably stiffer than one oriented horizontally. For standard residential listings, corrugated plastic holds up well through a typical 30–60 day listing period.
Aluminum
The right choice for 24"×36" and larger panels, especially on exposed sites facing highways or open fields. Aluminum does not flex or curl at the edges the way coroplast can at larger sizes, and it maintains a flat print surface over months rather than weeks. For larger panels facing high-wind exposure, rigid materials like aluminum are the practical standard — the wind-load on a 24"×36" panel is roughly 2.25 times that of an 18"×24" panel, and a flimsy substrate will bow, spin, or detach from its frame.
PVC and foamcore
Rigid PVC suits indoor open-house displays and A-frame inserts where weather exposure is minimal. Foamcore is strictly an indoor material — it absorbs moisture and degrades quickly outdoors. Neither is a substitute for aluminum on large exterior panels.
Pro Tip: If you are ordering 24"×36" panels for a listing near a coastal area or an open lot with no windbreak, specify aluminum and budget for a reinforced 2-post frame. The extra cost is far less than a reprint and reinstall after the first storm.
What mounting hardware works with each panel size?
Getting the hardware right matters as much as getting the panel size right. The wrong stake or frame leaves a sign leaning, spinning, or sitting too low to read.
- Metal H-stakes (H-wire): The standard for 18"×24" corrugated plastic panels. Most H-stakes accept panels up to about 24"×24". They push directly into the ground and require no tools. The 18"×24" panel fits virtually all standard H-stakes and retail wire frames, which is one reason it became the residential default.
- 2-post wood or metal frames: Required for 24"×30" and 24"×36" panels. Two vertical posts driven into the ground with a crossbar or direct panel attachment. More stable than H-stakes in wind and better suited to heavier aluminum panels.
- A-frame (sandwich board) hardware: Typically holds panels in the 18"×24" to 24"×36" range depending on the frame model. Used for open-house directional placement on sidewalks or driveways where staking is not possible.
- Post-mounted frames: Permanent or semi-permanent installations common in commercial listings. Panel size is determined by the frame’s opening; verify the frame spec before ordering panels.
- Rider attachments: Standard riders measure 24"×6" and clip above or below the main panel on a post-mounted sign. They carry supplemental information — agent name, price, “Open House” — without crowding the primary panel. Rider clips are typically sold separately from the main frame.
Mounting height: Where statutes specify a minimum, they commonly set the bottom edge of the sign at 3–5 feet above grade. When local code is silent, that same 3–5 foot range is a practical standard for visibility from a vehicle. Signs mounted too low disappear behind landscaping; signs mounted too high exceed many municipal height caps.
For a deeper look at frame options and compatibility, sign frames for real estate covers the most common configurations agents use.
What file specs do you need for print-ready real estate signs?
Sending the wrong file to a printer is one of the most common causes of reprints. These are the specs that matter.

| Spec | Recommended Value | Why It Matters |
|---|---|---|
| Resolution (DPI) | 300 DPI at final print size | Anything lower produces visible pixelation on large panels |
| Bleed | 0.125" bleed on all sides | Prevents white edges if the cut shifts slightly |
| Safe zone (margins) | — | Keeps type and logos from being cut off |
| Color mode | CMYK | RGB files shift color unpredictably in print |
| File format | PDF/X-1a, high-res TIFF, or AI with outlined fonts | Preserves fonts, colors, and bleed settings reliably |
| Main-line type height | 2" minimum | Meets stricter state legibility standards and reads at distance |
Yardsigns.com’s print specifications align with these standards: 300 DPI, 0.125" bleed, safe zone for type, and print-quality PDF or high-resolution TIFF as preferred formats.
On minimum letter heights: a 2-inch main-line type height covers the stricter state examples and improves readability in low-light or roadside conditions. Secondary lines (agent name, phone) can drop to 1 inch on an 18"×24" panel without losing legibility at typical residential approach distances. Decorative fonts with thin strokes or tight letter spacing fail at distance even when the point size looks adequate on screen — always proof at actual print scale.
What local and state rules should you check before printing?
Local rules are where agents get caught. Municipal ordinances, HOA covenants, and MLS board policies can each impose restrictions that override the industry standard sizes above, and they vary significantly even within the same metro area.
Representative example: Newport Beach, California limits real estate signs to 1.5 square feet (216 square inches) and a maximum height of 4 feet. A standard 18"×24" panel is 432 square inches — twice the Newport Beach limit of 216 square inches. Agents working in that city need a custom smaller panel, not the industry default.
Common restrictions to check before ordering:
- Number of signs — allowed per property
The action step is straightforward: contact your city or county planning or code enforcement office, review your HOA’s CC&Rs, and check your MLS board’s sign policy. Do this before bulk ordering. A short compliance checklist — panel area, height, required info, placement — takes ten minutes to complete and prevents a costly reprint or a removal notice.
What sizing and design mistakes do agents most often make?
Most reprints and compliance problems trace back to a short list of repeatable errors.
Too much copy on the panel. An 18"×24" sign is not a brochure. Limit the main panel to three or four elements: brokerage name or logo, a clear call to action (phone number or URL), and agent name if required. Everything else belongs on a rider or a separate directional sign. Overcrowding the panel and setting main-line type too small are the two most common errors that reduce response and sometimes trigger removal requests from HOAs.
Main-line type set too small. If your brokerage name or phone number is under 2 inches tall on the final printed panel, it will not read reliably from a moving vehicle. Set the main line first, at 2 inches minimum, then fit everything else around it.
Ignoring setback and road speed. Ordering 18"×24" panels for every listing regardless of road conditions is the most common visibility mistake. A sign that works perfectly on a quiet cul-de-sac is invisible on a 45 mph collector road.
Incorrect file setup. Low DPI, missing bleed, or RGB color mode are the three file errors that cause the most print quality problems. Run through the spec table in the previous section before sending any file to production.
Wrong hardware for the panel size. An H-stake is not designed for a 24"×36" aluminum panel. Ordering the wrong hardware means a return trip to the site, a second hardware order, and a delayed installation.
Quick pre-send checklist:
- [ ] Panel size verified against local/HOA rules
- [ ] Main-line type at 2" minimum
- [ ] Copy limited to 3–4 elements
- [ ] File at 300 DPI, CMYK, with 0.125" bleed
- [ ] Hardware ordered matches panel size and substrate
Key Takeaways
The single most important rule for US real estate sign dimensions: start with a standard residential size panel, verify local caps before ordering, and size up only when road speed or setback genuinely demands it.
| Point | Details |
|---|---|
| Default residential size | 18"×24" fits standard H-stakes and most retail frames; use it for typical residential listings. |
| Size up for visibility | Choose 24"×36" or 24"×30" for high-speed roads, long setbacks, or large commercial lots. |
| Check local rules first | Municipal codes can cap panel area below the industry standard — Newport Beach limits signs to 1.5 sq ft. |
| Print-ready file specs | Submit files at 300 DPI, CMYK, with 0.125" bleed and a safe zone to avoid reprints. |
| Yardsigns for fast orders | Yardsigns ships most small orders within 24 hours with free proofs, included H-stakes, and UV-resistant inks. |
The size that actually moves listings
Here is what most sign guides skip: the biggest legibility problem in residential real estate is not panel size — it is type size. Agents consistently order the right panel and then pack it with so much copy that the main line shrinks below 1.5 inches. A driver has roughly two seconds to read a yard sign at 25 mph. Two seconds. That is enough time for a brokerage name and a phone number, and nothing else.
The conventional wisdom says “bigger sign equals more visibility.” That is only half true. A 24"×36" panel covered in 10-point type is less effective than an 18"×24" panel with a clean 2-inch phone number. Size creates the opportunity; type size and copy discipline deliver the result.
The other overlooked issue is hardware. Agents who upgrade to a larger panel for a high-traffic listing often forget to upgrade the mounting system. A 24"×36" aluminum panel on a single H-stake will spin, lean, or pull out of the ground in moderate wind. The sign becomes invisible — or worse, a liability. Match the substrate and the frame to the panel area, every time.
One practical habit worth building: photograph every new sign installation from the curb at the actual approach distance before you leave the site. If you cannot read the main line in the photo, neither can a driver. Fix it before the listing goes live, not after a week of missed calls.
Yardsigns has your real estate signs ready to ship fast
When a listing goes live tomorrow and you need signs today, turnaround time is the only spec that matters. Yardsigns prints and ships most orders of under 50 pieces within 24 hours, with free design proofs and unlimited revisions so your art is right before it goes to press.
Every order includes UV-resistant inks that hold color through a full listing season, and H-stakes come included on standard yard sign orders so you are not hunting for hardware separately. Need double-sided printing for a post-mounted panel? That is a standard option. Ordering 100 signs for a new development? Bulk pricing scales with volume.
Practical features agents rely on:
- Real estate sign templates — ready to customize with your brokerage branding
Browse realtor yard sign templates to find a layout that fits your brokerage, or go straight to yardsigns.com to start your order and get a free proof within hours.
