


Campaign Sign Distribution Strategy: 2026 Field Guide
A campaign sign distribution strategy is a mapped plan that puts the right number of readable yard signs in priority precinct corridors at the right times. Start by building a visibility map, then allocate from there. Campaigns that skip the map end up scattering signs where it’s convenient rather than where it counts. For a city council race, a moderate number of signs placed in two or three targeted corridors will outperform a larger number of signs spread randomly across a district. For state or congressional races, the number of signs needed scales with district size and competitiveness, requiring significantly more signs than smaller races. When you’re ready to order, Yardsigns offers fast turnaround on weatherproof corrugated plastic signs with included H-stakes, so your field team isn’t waiting on production while the campaign clock runs.
Table of Contents
- What does a campaign sign distribution strategy actually look like?
- How many signs should you order for your race?
- Where should signs go first? A tiered placement hierarchy
- When should you deploy and remove campaign signs?
- Compliance and courtesy checklist for sign placement
- What makes a campaign sign readable at speed?
- Choosing the right materials and installation methods
- How to route volunteers and track placements efficiently
- Low-cost ways to measure whether your signs are working
- Sample deployment plans for small, medium, and large campaigns
- What to ask your printer before you order
- Key Takeaways
- The map-first lesson most campaigns learn too late
- Yardsigns delivers fast when your campaign needs signs now
- Useful sources and where to verify local rules
What does a campaign sign distribution strategy actually look like?
The map-first approach is the single most important shift a campaign can make in its sign distribution methods. Instead of asking “where can we put signs?” you ask “where do our target voters travel, and when?” That reframe changes everything about how you allocate inventory.
Step-by-step: building your visibility map
- Define your objective. Are you building name recognition in a swing precinct, reinforcing support in a base precinct, or saturating a commuter corridor before early voting opens? Each objective produces a different map.
- Import precinct boundaries. Download your county’s precinct shapefiles from the county clerk or your state’s GIS portal. Load them into Google My Maps or your campaign’s VAN export. Color-code precincts by voter density and partisan lean.
- Add commuter corridors. Overlay the arterial roads and feeder streets that carry the most daily traffic through your target precincts. These are your highest-impression corridors.
- Mark high-opportunity blocks. Flag intersections with natural slow-downs (traffic lights, stop signs, school zones), early-vote locations, and confirmed supporter addresses. These become your Tier 1 and Tier 2 placement nodes.
- Record your layers. For each map layer, note what you’re tracking: voter density, swing score, commute volume, supporter yards, and event sites. A map with unlabeled layers is useless to a volunteer who wasn’t in the planning meeting.
The key insight from effective yard sign programs is that deep coverage in a few targeted neighborhoods consistently outperforms scattered coverage across many. Two fully saturated feeder roads into a swing precinct will generate more compounding impressions than the same number of signs spread across six neighborhoods.
Suggested map layers to build:
- Voter density by block (from VAN or state voter file)
- Swing precinct score (target the persuadable middle)
- Commute arteries and daily traffic corridors
- Early-vote and Election Day polling locations (with buffer zones marked)
- Confirmed supporter yards (your highest-trust placements)
- Upcoming event sites and candidate appearance locations
How many signs should you order for your race?
Sign quantity is one of the most common budget mistakes campaigns make. Order too few and you leave high-value corridors bare. Order too many and you’re paying for storage and disposal. The right number starts with race size, then gets refined by your map.
Sample counts by race size
| Race Type | Typical Sign Count | Notes |
|---|---|---|
| City council / local | 200–500 signs | Focus on 2–3 corridors; deep beats broad |
| State representative | 2,000–5,000 signs | Cover 4–6 precinct clusters; stage in two drops |
| County / congressional | 2,000–5,000 signs | Full corridor saturation; replacement buffer critical |
These ranges come from documented campaign practice and scale with district size and competitiveness. A contested swing district at the high end of a range is money well spent.
Allocation rules
- Density by precinct: Assign more signs to swing precincts and high-traffic corridors. Base precincts get lighter coverage; persuadable zones get the bulk.
- Corridor multiplier: Pick two feeder roads into your top precinct and place 2–3 signs per block for a 4–6 block run. This concentrated run creates visible social proof that scattered placement never achieves.
- Supporter-yard reserve: Set aside 15–20% of inventory for confirmed supporter placements. These are your most trusted, longest-lasting locations.
- Replacement buffer: Budget 10–15% of total inventory for theft, damage, and vandalism. In competitive races, sign theft is common in the final two weeks.
A simple formula: multiply your target blocks by the signs-per-block rate, then add 10–20% for replacements. For a corridor of 10 blocks at 2 signs per block, that’s 20 signs plus 4 replacements, or 24 signs per corridor.
Quick ordering checklist:
- Confirm production lead time with your printer before setting your field date
- Order double-sided for maximum impressions per sign
- Specify UV-resistant inks if your race runs through summer or early fall
- Confirm H-stakes are included or order separately
- Request a proof before full production runs
Where should signs go first? A tiered placement hierarchy
Not all locations deliver equal impressions. A tiered system lets your field team prioritize high-value spots and work down the list as inventory allows, rather than filling in whatever’s easiest.

Tier 1: High-traffic intersections and arterial slow-downs. These are your most valuable placements. Signalized intersections, school zones, and merge points where traffic backs up give drivers 10–30 seconds of dwell time on your sign. Place here first, every time.
Tier 2: Supporter yards on feeder roads. A confirmed supporter’s yard on a busy feeder road combines high impressions with social proof. Neighbors see that someone they know supports the candidate. These placements tend to stay up longer and get replaced faster when damaged.
Tier 3: Neutral residential corridors. Interior neighborhood streets with moderate foot and vehicle traffic. Lower impressions per sign, but useful for building density and the perception of broad support.
Tier 4: Event and approach signage. Temporary placements near candidate events, community meetings, and voter contact canvassing areas. These go up the day before and come down the day after.
Dos and don’ts for each tier
- Do place Tier 1 signs at the corner of the intersection, not mid-block where sightlines are blocked by parked cars or landscaping.
- Don’t place any sign within the polling-place buffer zone. Most states require a 100-foot minimum; many require more. Check your county’s specific rule.
- Do cluster 2–3 signs at a single high-traffic node to create a visible concentration. One sign at an intersection is easy to miss; three in sequence on the approach road are not.
- Don’t place signs on utility poles, highway medians, or public right-of-way without verifying local ordinances first.
- Do record strategic sightlines and obstructions during your site survey. A sign behind a hedge or facing away from traffic is wasted inventory.
Pro Tip: For local election placement ideas that go beyond the basics, Yardsigns has a practical resource on election yard sign placement worth reviewing before you finalize your map.
When should you deploy and remove campaign signs?
Timing your sign drops to campaign milestones is as important as where you place them. A sign that goes up 10 weeks out fades into the background. One that appears the week voter contact intensifies reinforces the message voters are already hearing.
Yard sign programs typically begin 4–6 weeks before election day, with peak activity in the final 3–4 weeks and GOTV saturation concentrated in the final week.
Staged deployment approach
Early awareness (6–8 weeks out): Place supporter-yard signs and a light presence in Tier 1 corridors. Goal is name recognition, not saturation. Keep inventory in reserve.
Zone saturation (3–4 weeks out): Full deployment across Tier 1 and Tier 2 locations. Coordinate with voter contact canvassing so signs appear in neighborhoods the same week doors are being knocked.
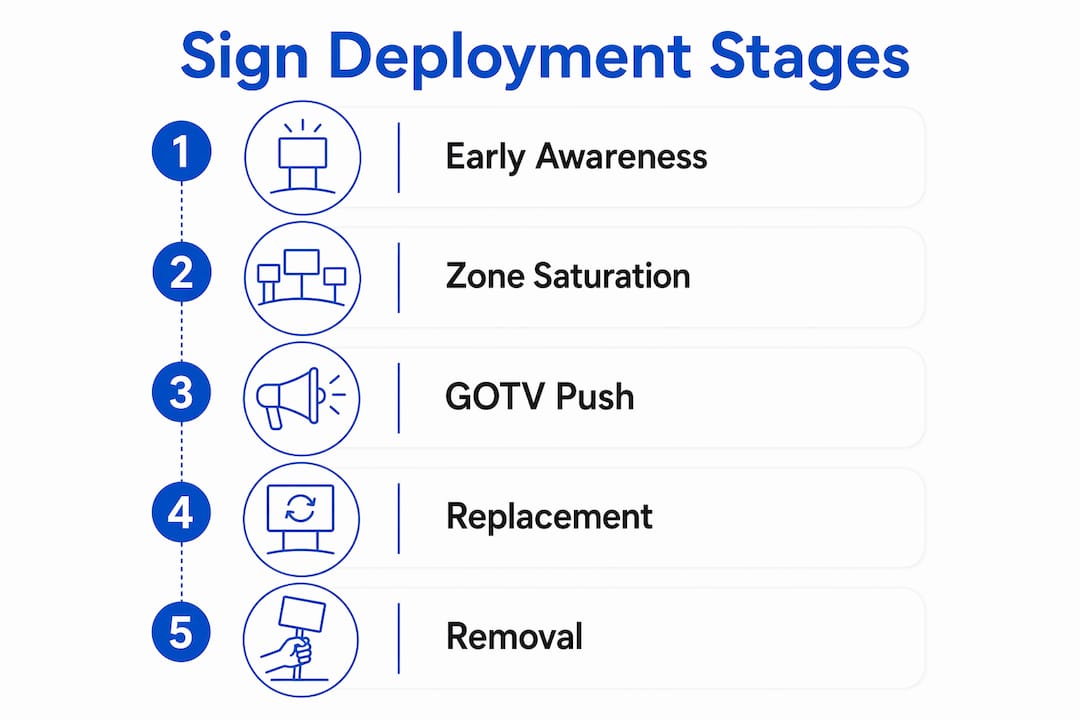
Last-week GOTV push: Saturate Tier 3 corridors and add temporary Tier 4 event signage. Replace any damaged or missing signs from earlier drops. This is your highest-impression window.
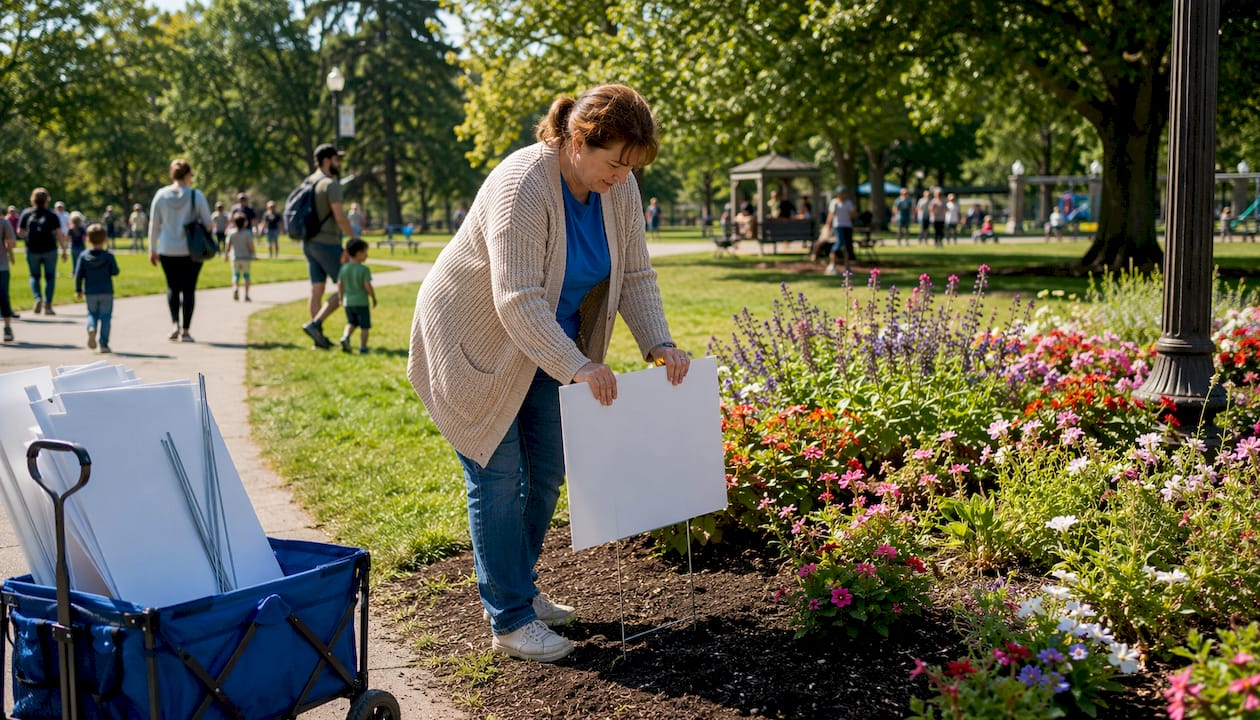
Removal plan: Most jurisdictions require sign removal within 5–10 days after the election. Assign removal routes to the same volunteers who handled installation. A signed pickup schedule prevents fines and protects the campaign’s reputation for the next cycle.
Quick deployment checklist:
- Confirm production lead time and order date relative to your first drop date
- Schedule volunteer shifts at least one week before each deployment window
- Build a replacement run into the final week calendar
- Set a removal date on the campaign calendar before election day
Compliance and courtesy checklist for sign placement
Ignoring local sign rules costs campaigns money, time, and credibility. A sign pulled by code enforcement is a sign that never reached a voter. Verify these items before your first drop.
- Polling-place buffer zones. Most states set a minimum distance (often 100 feet, sometimes more) within which campaign materials are prohibited. Check your specific state and county rules with the county clerk or local election office. Never assume the standard applies uniformly.
- Public right-of-way rules. Many municipalities prohibit signs in the public right-of-way (the strip between the sidewalk and the street). Others allow it. Verify locally before placing any sign on public land.
- Local sign ordinances. Some cities restrict sign size, the number of signs per property, or the dates signs may be displayed. Review your city or county ordinance directly, not from a secondhand summary.
- Homeowner permission. For every private property placement, get explicit permission from the property owner. Verbal permission is the minimum; a brief consent log (address, owner name, date, volunteer name) protects the campaign if a dispute arises later.
- Field documentation. For each placement, record a timestamped photo, the address or cross street, the volunteer’s name, and the sign’s condition. This four-field log is fast in the field and invaluable for accountability.
- Verify with primary sources. Always confirm campaign signage placement rules with your county clerk or local election office. Rules change between cycles, and a rule that applied in 2024 may have been amended for 2026.
What makes a campaign sign readable at speed?
The Five-Second Rule is the standard test for political yard sign design: a driver passing at 35 mph should be able to read and retain your sign’s core message in five seconds or less. Most signs fail this test because they try to say too much.
Design rules that work
- Prioritize three elements only: candidate name, office sought, and one short call-to-action or tagline. Everything else is noise.
- Limit text to 3–5 words. A two-line sign with the candidate’s name on line one and the office on line two is the most readable format at speed.
- Use high contrast. Dark text on a light background, or light text on a dark background. Avoid color combinations that reduce contrast for color-blind viewers (red/green combinations are the most common problem).
- Font size matters more than font style. Use a bold sans-serif at a size that fills the sign. If the text looks small on your proof, it will be unreadable from a car.
- Test readability before you order. Print a proof at full size, tape it to a wall, and read it while walking past at a normal pace. If you have to slow down to read it, the font is too small or there’s too much text.
Winning campaign signage consistently uses bold contrast, minimal words, and a dominant name treatment. Candidates who add a slogan, website, phone number, and party affiliation to a standard 18x24 sign are trading readability for completeness, and voters at speed will remember none of it.
Accessibility note: Choose color combinations that pass a basic contrast ratio check. Tools like WebAIM’s Contrast Checker can verify your palette before you go to print.
Choosing the right materials and installation methods
Corrugated plastic (coroplast) is the standard for political yard signs, and for good reason. It’s lightweight, weatherproof, and cost-effective at volume. Aluminum is more durable and better for permanent or semi-permanent placements, but it’s heavier and more expensive per unit. For most campaign applications, 4mm corrugated plastic handles wind, rain, and a full campaign season without issue.
Material and mounting comparison
- Corrugated plastic (4mm coroplast): Best for standard yard sign use. Holds up through rain and moderate wind. UV-resistant inks prevent fading over a 6–8 week campaign window.
- Aluminum: Better for high-traffic locations where signs face more physical stress. Higher cost per unit; reserve for Tier 1 placements in long campaigns.
- H-stakes: The standard mounting method for yard signs. Drive the stake into the ground first, then slide the sign onto the stake. Easier and faster than wire frames in most soil conditions.
- Wire frames: Useful for softer ground or when H-stakes aren’t available. Slightly less stable in wind.
- Grommets and zip ties: For fence-mounted or barrier placements. Specify grommets on the top corners of your print order if you plan to use this method.
Pro Tip: Include mounting specs in your print brief: “18x24 corrugated, 4mm coroplast, grommets on top corners, include 12-inch H-stake per sign.” This prevents field improvisation that reduces readability or durability, and it’s a standard recommendation for any scaled signage program.
Drive H-stakes to a depth of at least 8–10 inches for stability. Angle the sign slightly toward oncoming traffic rather than perpendicular to the road for better sightline visibility.
How to route volunteers and track placements efficiently
A sign in a box is not a campaign asset. Getting signs from storage to street requires a routing plan, a tracking system, and a replacement workflow that doesn’t depend on a single volunteer remembering to follow up.
Volunteer shift template
- Assign routes before the shift. Each volunteer or team gets a specific route with a start point, end point, and a list of target addresses or intersections. Routes should be circular to minimize backtracking.
- Set a time window. Two-hour shifts work well for most routes. Longer shifts reduce accuracy and increase missed placements.
- Brief on compliance. Every volunteer should know the local buffer rules, the permission requirement, and the photo-reporting standard before they leave.
- Check-in and check-out. Volunteers confirm their route completion and upload photos at the end of each shift. A simple shared folder (Google Drive or a campaign app) works for most small and medium campaigns.
Tracking and replacement workflow
Photo logs and placement density maps are non-negotiable for effective campaign accountability. Use a four-field log for every placement: photo, address or cross street, volunteer name, and condition (good/damaged/missing). This takes under 30 seconds per sign and gives you a real-time inventory picture.
- Replacement ticketing: When a volunteer reports a damaged or missing sign, it goes into a replacement queue. Assign a replacement run every 3–4 days during peak deployment.
- Inventory buffer: Keep 10–15% of total inventory in reserve specifically for replacements. Don’t deploy your full order on day one.
- Post-campaign returns: Assign a pickup route for supporter-yard signs after the election. Leaving signs up past the removal deadline creates compliance risk and reflects poorly on the campaign.
Routing best practice: Start each route at the highest-priority node (your Tier 1 intersection) and work outward. This guarantees that if a volunteer runs short on time or inventory, the most valuable placements are already covered.
Low-cost ways to measure whether your signs are working
Yard signs are not directly trackable the way digital ads are, but you can build a lightweight measurement system that tells you whether your sign strategy is moving the needle.
Measurement checklist:
- QR codes and short URLs: Add a unique QR code or short URL to signs in specific corridors. Track scan and visit volume by corridor to compare performance across zones.
- Local web traffic spikes: Monitor your campaign website’s traffic by zip code or city. A spike in traffic from a neighborhood where you just deployed signs is a signal worth noting.
- Voter contact response rates: Compare canvassing response rates in sign-saturated precincts versus control precincts. Higher recognition often translates to warmer door contacts.
- Event turnout by zone: Track attendance at candidate events relative to sign density in the surrounding area.
Coordinated signage campaigns that combine physical placement with digital reinforcement have shown meaningful lifts in brand awareness. The same principle applies to political campaigns: a voter who sees your yard sign on the way to work and then encounters your digital ad that evening is getting a compounding impression that neither channel delivers alone.
Simple A/B test setup
Pick two comparable corridors in the same precinct. Deploy signs in one corridor two weeks earlier than the other. Track QR scan rates, web traffic, and canvassing response rates in both. After the campaign, compare results. This is a low-cost test that gives you real data for the next cycle.
When signals shift (clicks drop, canvassing response falls in a zone), reallocate signs to higher-performing corridors rather than leaving inventory in place out of habit.
Sample deployment plans for small, medium, and large campaigns
These plans are designed to be copied and adapted. Adjust counts and timelines to your specific district and voter file.
Sample deployment plan by campaign size
| Campaign Size | Sign Count | Precinct Clusters | Volunteer Hours | Timeline |
|---|---|---|---|---|
| Small (city council) | 200–500 signs | 2–3 corridors | moderate volunteer hours | 4 weeks out; peak at week 3 |
| Medium (state rep) | 2,000–5,000 signs | 4–6 clusters | substantial volunteer hours | 6 weeks out; peak at weeks 4–5 |
| Large (county/congressional) | 2,000–5,000 signs | 8–12 clusters | extensive volunteer hours | 8 weeks out; staged in 3 drops |
Plan templates
Small campaign:
- Target 2 feeder roads into your top swing precinct; 2–3 signs per block for 5 blocks each
- Reserve 30–40 signs for supporter yards; 20–30 for replacement
- One volunteer team, two 2-hour shifts per week
- Begin 4 weeks before election day; final push at 7 days out
Medium campaign:
- Identify 4–6 precinct clusters from your voter file; rank by swing score
- Deploy Tier 1 and Tier 2 locations in week one, Tier 3 in week two
- Replacement run every 4 days; photo log required for all placements
- Coordinate sign drops with canvassing schedule so signs appear the same week doors are knocked
Large campaign:
- Stage three drops: initial awareness (8 weeks out), zone saturation (4 weeks out), GOTV push (final week)
- Assign a route captain per precinct cluster; each captain manages their own inventory buffer
- Daily replacement reporting during the final two weeks
- Full removal plan assigned before election day; all signs down within 7 days post-election
What to ask your printer before you order
Ordering signs without a clear brief is one of the most common and costly campaign mistakes. A few direct questions before you place the order save time, money, and field headaches.
Printer question list
- What is your standard lead time for orders under 50 pieces, and for runs over 500?
- Do you print double-sided as standard, or is it an add-on?
- What ink type do you use, and is UV resistance standard or optional?
- Are H-stakes included, and what size?
- Do you provide a free proof before production?
- What file format do you require, and what are your bleed and resolution specs?
- Do you offer bulk pricing tiers, and at what quantities do discounts apply?
- What is your replacement or reorder policy if signs arrive damaged?
Turnaround expectations
- Under 50 pieces: Yardsigns ships most orders within 24 hours. This matters when you need a fast replacement run or a last-minute GOTV push.
- Larger runs (500+): Expect 1–3 business days for production, plus shipping time. Build this into your deployment calendar.
Pro Tip: Include your mounting specs in the order brief: “18x24 corrugated plastic, 4mm coroplast, double-sided, UV-resistant inks, grommets on top corners, 12-inch H-stake per sign.” Yardsigns offers political yard sign options with these specs built in, which removes the guesswork from your order.
For your production file, confirm bleed dimensions, resolution (300 DPI minimum for print), and color mode (CMYK) before submitting. A file that looks sharp on screen can print poorly if these specs aren’t met.
Key Takeaways
A campaign sign distribution strategy works when it starts with a visibility map, allocates by precinct priority, and stages deployment to match voter contact windows.
| Point | Details |
|---|---|
| Map first, always | Build a precinct visibility map before ordering or placing a single sign. |
| Scale counts to race size | Small races need 200–500 signs; congressional races typically deploy 2,000–5,000. |
| Start 4–6 weeks out | Begin placement 4–6 weeks before election day and peak in the final 3–4 weeks. |
| Document every placement | Use a four-field photo log (photo, address, volunteer name, condition) for every sign placed. |
| Yardsigns for fast runs | Yardsigns ships orders under 50 pieces within 24 hours, making it the practical choice for replacement runs and last-minute GOTV pushes. |
The map-first lesson most campaigns learn too late
The most common mistake in sign distribution isn’t ordering too few signs or placing them too late. It’s placing them without a map. Campaigns that skip the visibility map end up filling in whatever supporter yards are available and calling it a strategy. The result is a scattered presence that voters barely notice.
The map-first approach forces a different discipline. When you’ve imported precinct boundaries, overlaid commute corridors, and ranked your target blocks by voter density and swing score, you stop asking “who will let us put a sign in their yard?” and start asking “which yards on this specific block will generate the most impressions for the voters we need to reach?” That’s a fundamentally different question, and it produces fundamentally different results.
Late-week saturation in a close precinct, coordinated with canvassing, is where sign strategy actually moves votes. A voter who sees your sign on the commute, gets a door knock that week, and sees the sign again on the way to the polls has had three reinforcing contacts. None of that happens by accident. It happens because someone built a map.
Yardsigns delivers fast when your campaign needs signs now
When your deployment calendar is tight and a replacement run can’t wait three days, Yardsigns is the practical answer. Orders under 50 pieces ship within 24 hours. Larger runs of 500 or more are typically ready in 1–3 business days, with free design proofs and unlimited revisions so your files are print-ready before production starts.

Every order includes double-sided printing, UV-resistant inks, and metal H-stakes. Corrugated plastic signs in 4mm coroplast are the standard, built to handle a full campaign season through wind and rain. Bulk discounts apply as your order scales, which makes Yardsigns a cost-effective option whether you’re running a city council race or a congressional campaign.
To match the tactical recommendations in this guide, request: 18x24 corrugated plastic, double-sided, UV-resistant inks, grommets on top corners, and 12-inch H-stakes per sign. Order your campaign signs at Yardsigns and have them in the field before your next volunteer shift.
Useful sources and where to verify local rules
- Political Campaign Street Marketing: Yard Signs, Street Teams, and the Ground-Level Playbook — practical guidance on sign counts, timing windows, and neighborhood targeting
- Yard Sign Marketing Campaigns: Political, Real Estate, and Event Formats That Work — brief-first planning and photo-reporting workflows
- How to Plan a Multi-Location Signage Strategy — standardized production briefs and compliance checklists
- Strategic Signage Placement — site survey methodology for sightlines, obstructions, and approach angles
- NPR: How Powerful Is a Political Yard Sign? — research context on sign effectiveness
- For local rules: Contact your county clerk or local election office directly before each campaign cycle. Polling-place buffer distances, right-of-way rules, and sign timing restrictions vary by jurisdiction and are updated regularly. Never rely on a secondhand summary for compliance decisions.
